
Date: 07/10/2020
New feature – Draw
SlabWare’s new Draw feature is a quick and easy way for you to create personalized sketches and estimates for your projects in just a few easy steps.
Sketch any shape you can imagine and then add edges, backsplash, and sinks. Choose from pre-set options or add your own custom templates for your customer. Draw freehand or use measurements; it’s up to you!
In minutes you’ll have a complete drawing and estimate that tells you exactly how much material you’ll need and which pieces or remnants will be left. The slabs that you select for this job will be automatically allocated and marked as “Held” in your inventory.
The new Draw feature is separate from SlabWare’s existing inventory management and you don’t need to use one to enjoy the benefits of the other. We believe that once you see how easy it is to have everything synced up together that you’ll choose to use the system to its fullest capabilities.
In the following lesson we’ll learn to use that new feature.
Step 1
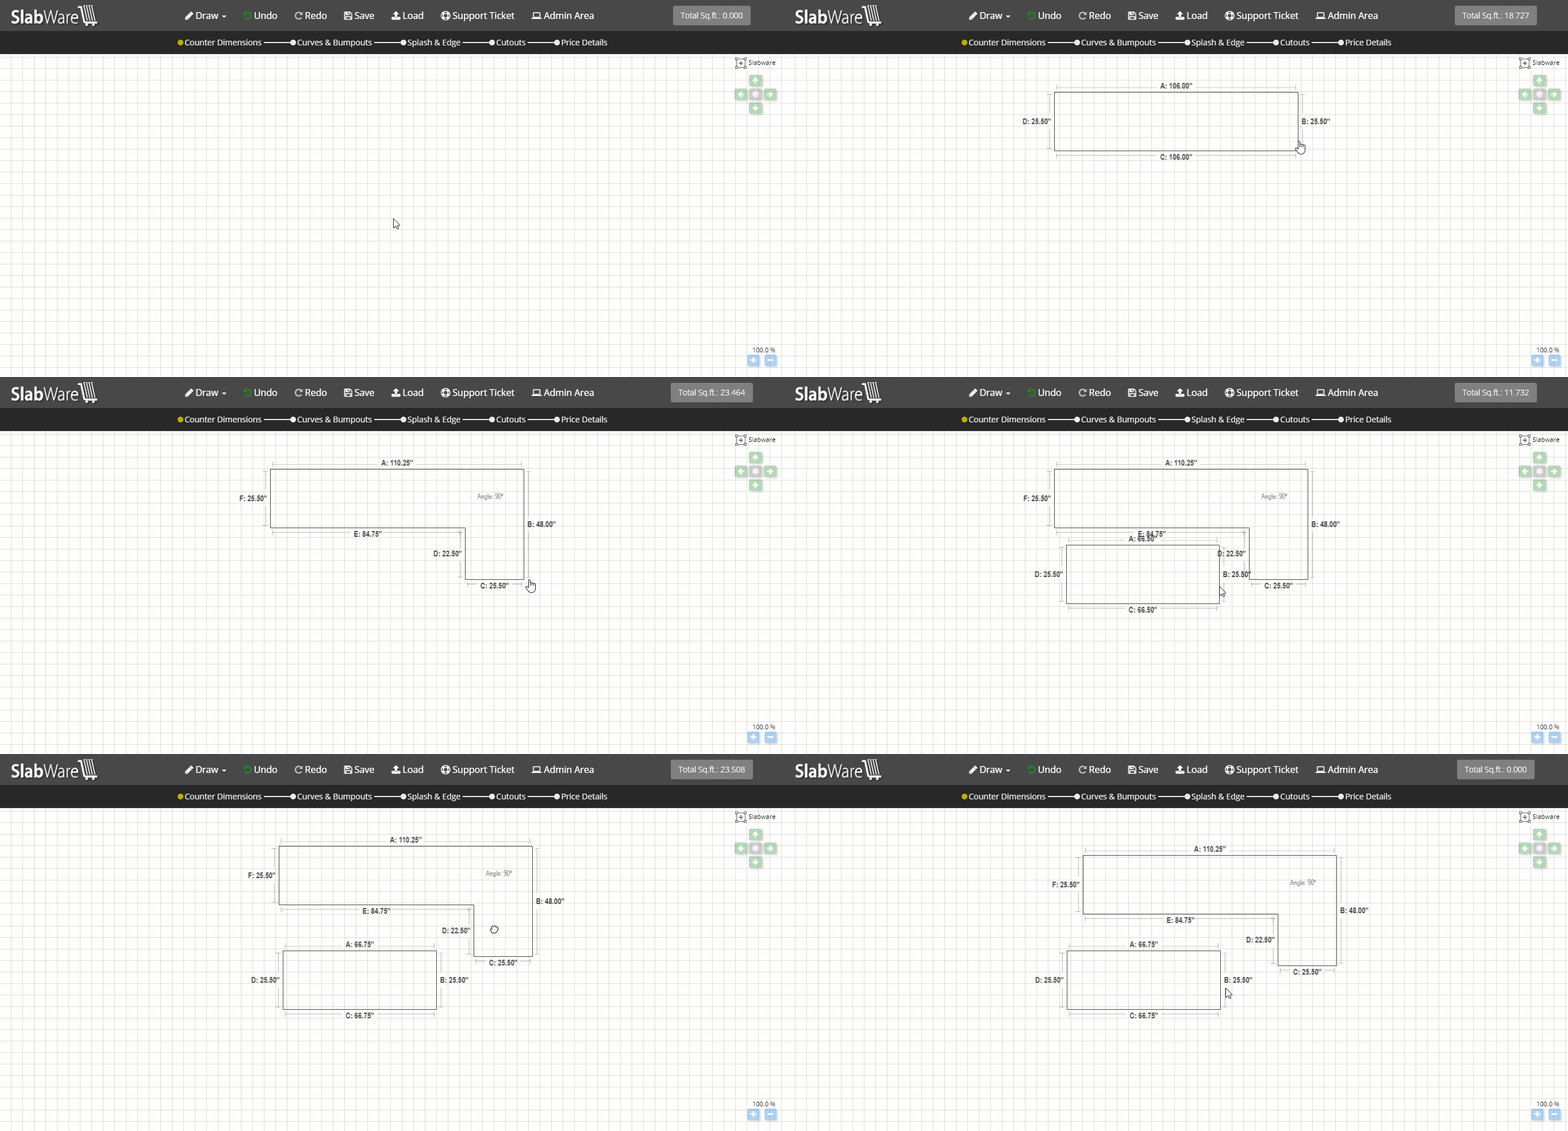
Start by making an initial sketch of your project. We’ll add basic shapes here as well and then move onto the details. To begin, simply hold down the mouse button and drag across the screen to create a shape.
- If you want another shape click “Draw” on the top menu to see other choices
- To change measurements click on the numbered measurements on the edge of your shape and enter your values
- To rotate your drawing click the right mouse button
- Shapes can be moved around your design by clicking to drag and releasing to drop.
Step 2
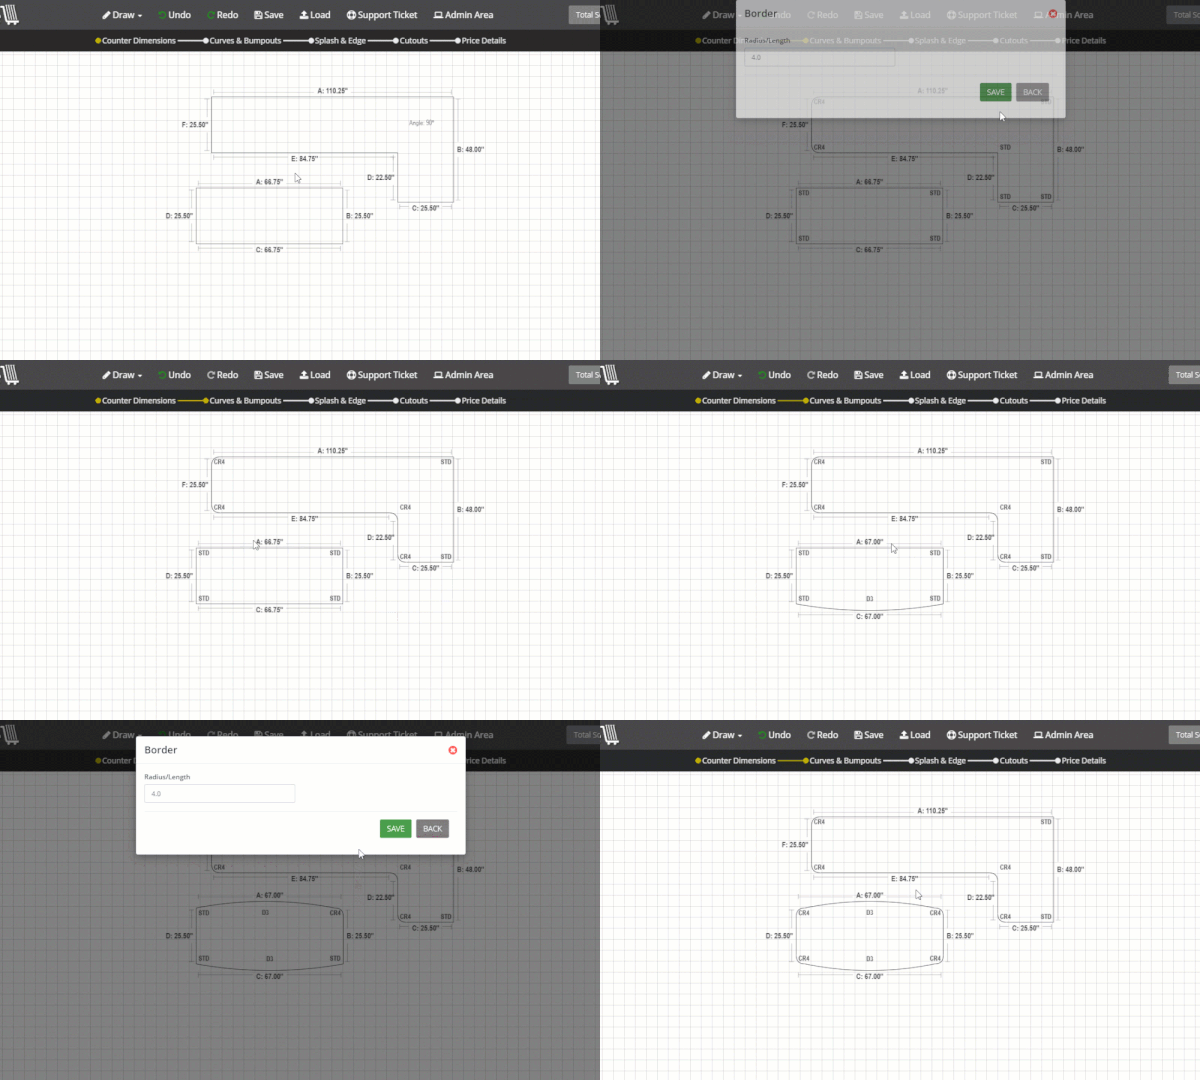 Now it’s time to add curves and bumpouts.
- To select a curve simply click on the one you want to change and all the curve options will appear. You’ll also be able to choose custom measurements.
- The process is the same for bumpouts: click the bumpout you want to change and select from the given options
Step 3
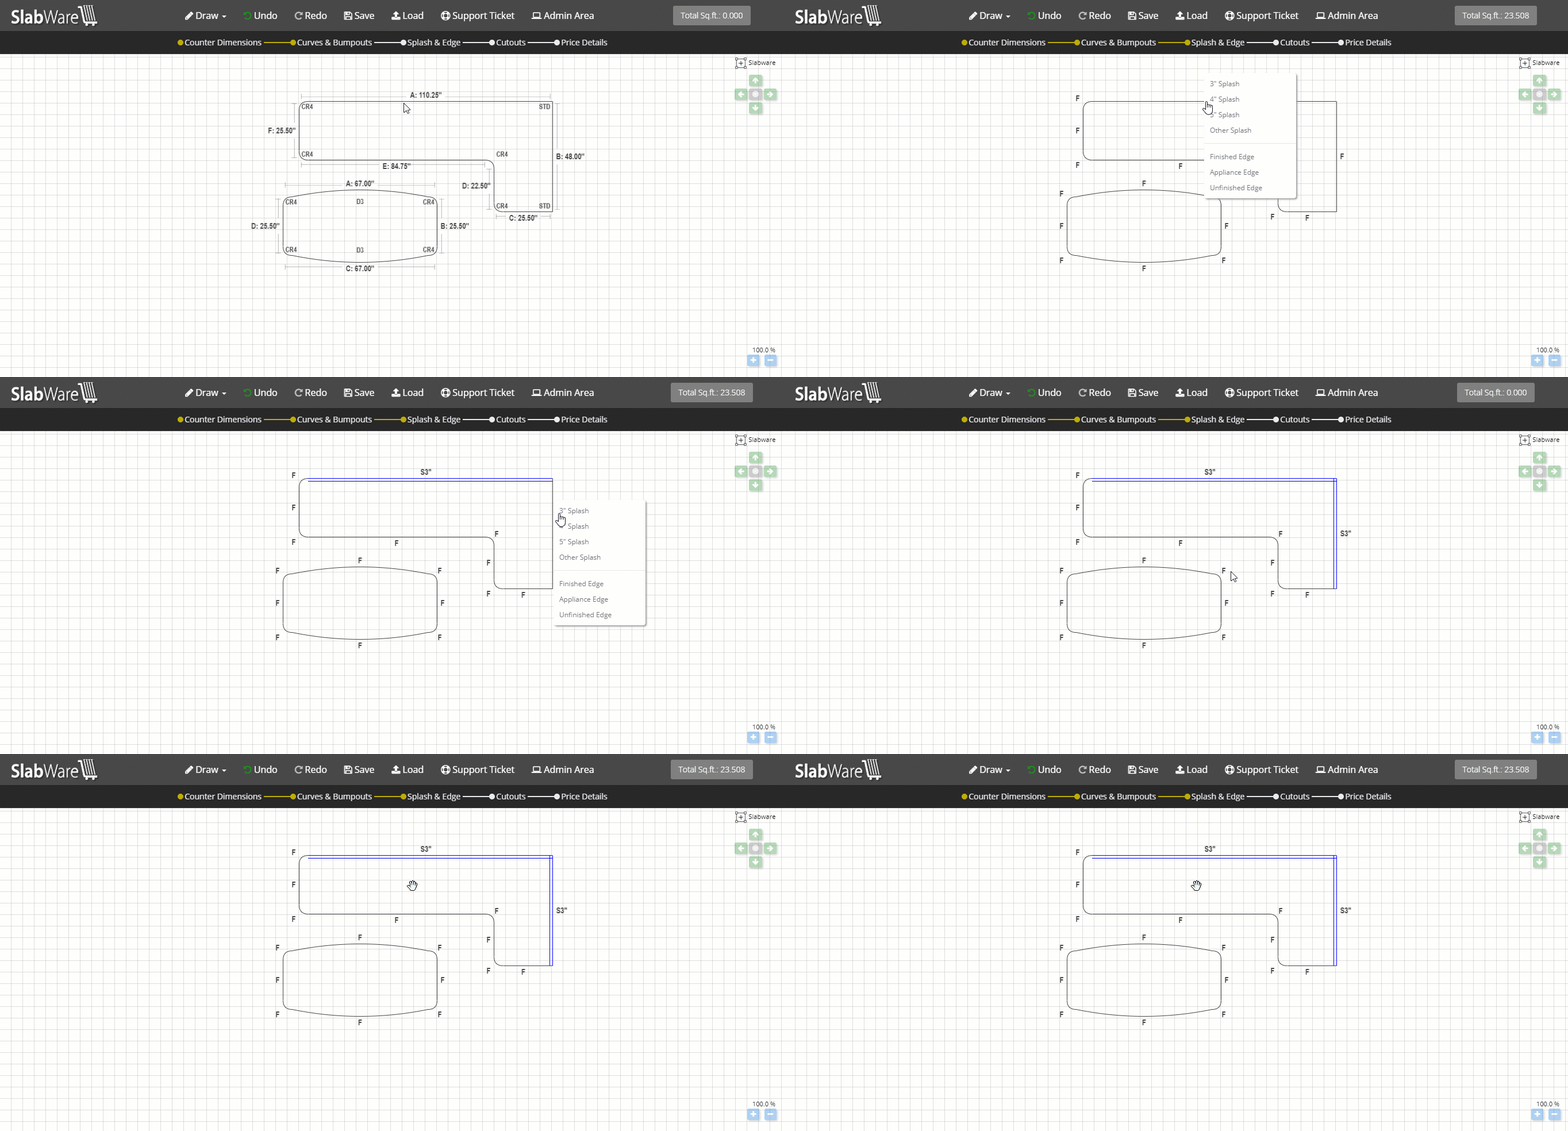
Here is where we’ll add backsplash and edge profiles.
- To place a backsplash or edge you just need to click the edge you want and select the desired option: It’s that easy!
- Choose from our pre-set backsplash sizes or choose your own custom dimensions on the same menu as the example above.
Step 4
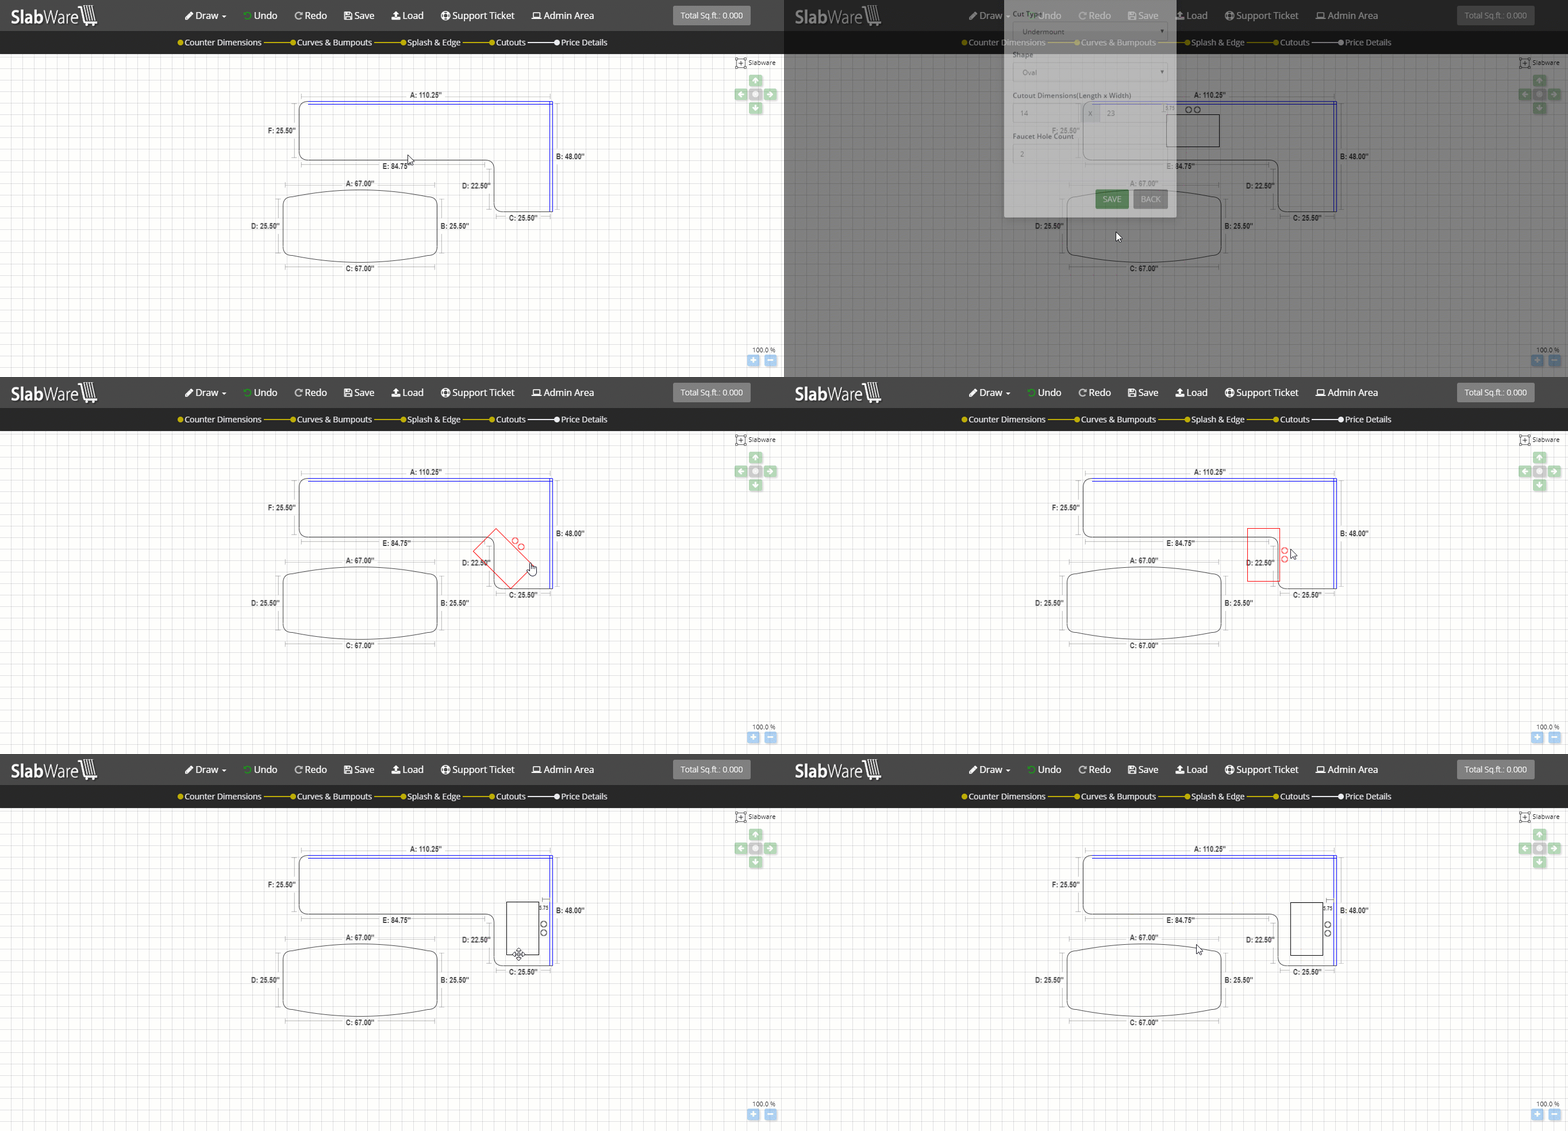
This is where we’ll add all the cutouts for sinks, stoves, and dishwashers.
- To add a cutout just select the shape you want the cutout to be and enter all the details.
- The cutout will appear and you can drag-and-drop it to the correct location on your drawing.
- If you move your cutout and the shape turns red that means your cutout is in an area outside of your project and you need to move it back.
- You can rotate your cutout by clicking on the right mouse button
Step 5
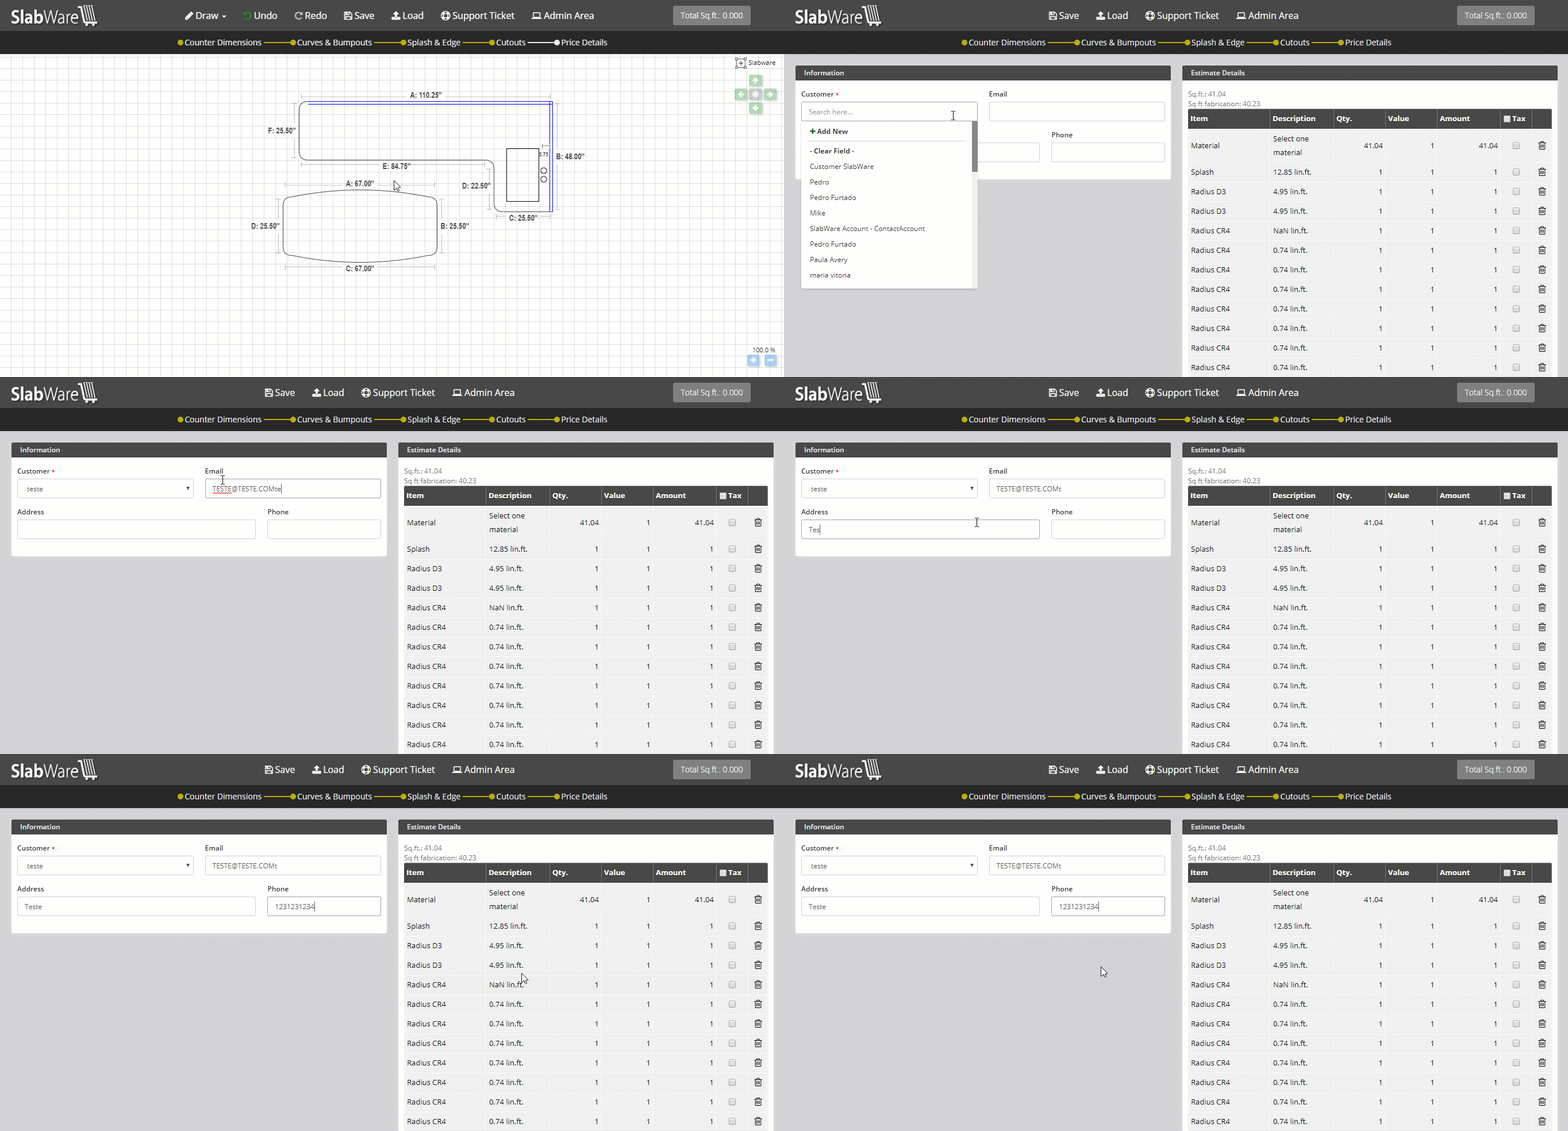
In this step we’ll enter the final pieces of information for the job and verify that everything is correct.
- You can add slabs or other materials to this project. Remember that if you have this feature linked with your inventory then those slabs or materials will be changed to “Held” in your inventory.
- You can add a contact to be linked to your estimate/drawing.
- SlabWare will automatically generate all the documents you need in .pdf files so you can print, send by email, etc.
Add or remove linked items to keep your information secure.
- If you don’t want to include an estimate you can simply save it on the top menu.
- Once you click save your job is complete!
What do you think about this new feature? We would love for you to give it a try.
Click here for your free 30-day trial!
Or Click here to schedule an online demo with our SlabWare support team!